Showing posts with label recipes. Show all posts
Sunday, October 9, 2011
Shrimp And Spinach Soup With Cilantro And Lime
This soup is fat-free, low-carb and my new favorite for Phase Two of the HCG Diet. If you're on Phase Three or Atkin's, start out by sauteing the garlic in a pat of butter. Then add the broth and go from there.
Ingredients (one serving):
1 cup broth (I used salt-free chicken broth because I didn't have any veggie broth on-hand)
1 garlic clove
1 lime
100 g frozen shrimp
3 cups spinach, chopped
2/3 cup cilantro, chopped
Mrs. Dash Southwest Chipotle Blend
salt and pepper
Crush and chop the garlic clove and saute it in the broth. Add the shrimp and juice the lime into pan. Let the shrimp warm up, then add the spinach and seasoning to taste. Once the shrimp is heated through and the spinach wilts, remove from the heat and stir in the cilantro.
I like my flavors bold and bright. If you don't, you might want to halve the amount of lime juice and cilantro.
This soup is a snap to make but no one has to know. Serve it at a family dinner and tell them you spent hours in the kitchen. For a non-dieting crowd, saute the garlic in butter as a first step, reduce the amount of broth, skip the spinach, and serve over brown rice. And don't forget to give them some healthy veggies on the side.
Monday, May 31, 2010
Strawberry Jam With Homegrown Strawberries
Your hint yesterday was that there would be lots of red in today's photo's... did you guess correctly? Gold stars for all who did! Ok, imaginary gold stars.
Last year was the first time I ever tried my hand at canning. And yesterday was the first time I have ever made jam! I'm pretty darned proud of myself.
And now on to the strawberry jam! I cruised the internet and saw most recipes included only three things: strawberries, pectin and sugar. The sugar helps preserve the fruit's color and shape; I am not ready to experiment with low-sugar recipes yet. Anyhoo, every recipe had different measurements so I just made up my own. Click here for a good resource for canning instructions. You don't have to can the jam; if you're going to use it up within a couple weeks, why bother. Just keep it in the fridge.
For the recipe you will need:
- 5 or 6 cups crushed strawberries,
- one envelope of pectin, and
- sugar (I used 6 cups and it was a little too sweet for me... and I like sweet).
For canning you will need:
- jars and lids (this recipe made enough jam for 9 half-pint jars), and
- a canner (a big pot to boil the jars full of jam).
- jar grippers/special tongs shaped to grab the jars out of the boiling water,
- a funnel for keeping the rims of the jars clean when filling them with jam,
- a fun stick with a magnet on it to pull the lids out of the water, and
- that flat piece of blue plastic laying over the funnel is a tool to measure headspace in the jar.
Jam-making goes pretty quickly, so before you start it's a good idea to go ahead and sterilize your canning jars by leaving them in boiling water for 10 minutes in your big canner-pot, and also put the lids in a saucepan and barely bring that pan to a boil. As soon as the lid-pan starts to boil, pull it off the heat. Leave the lids in the warm water while you make the jam. Pull the sterilized jam jars out of the water and start making your jam! I did all my boiling and sterilizing while I was cleaning the berries.
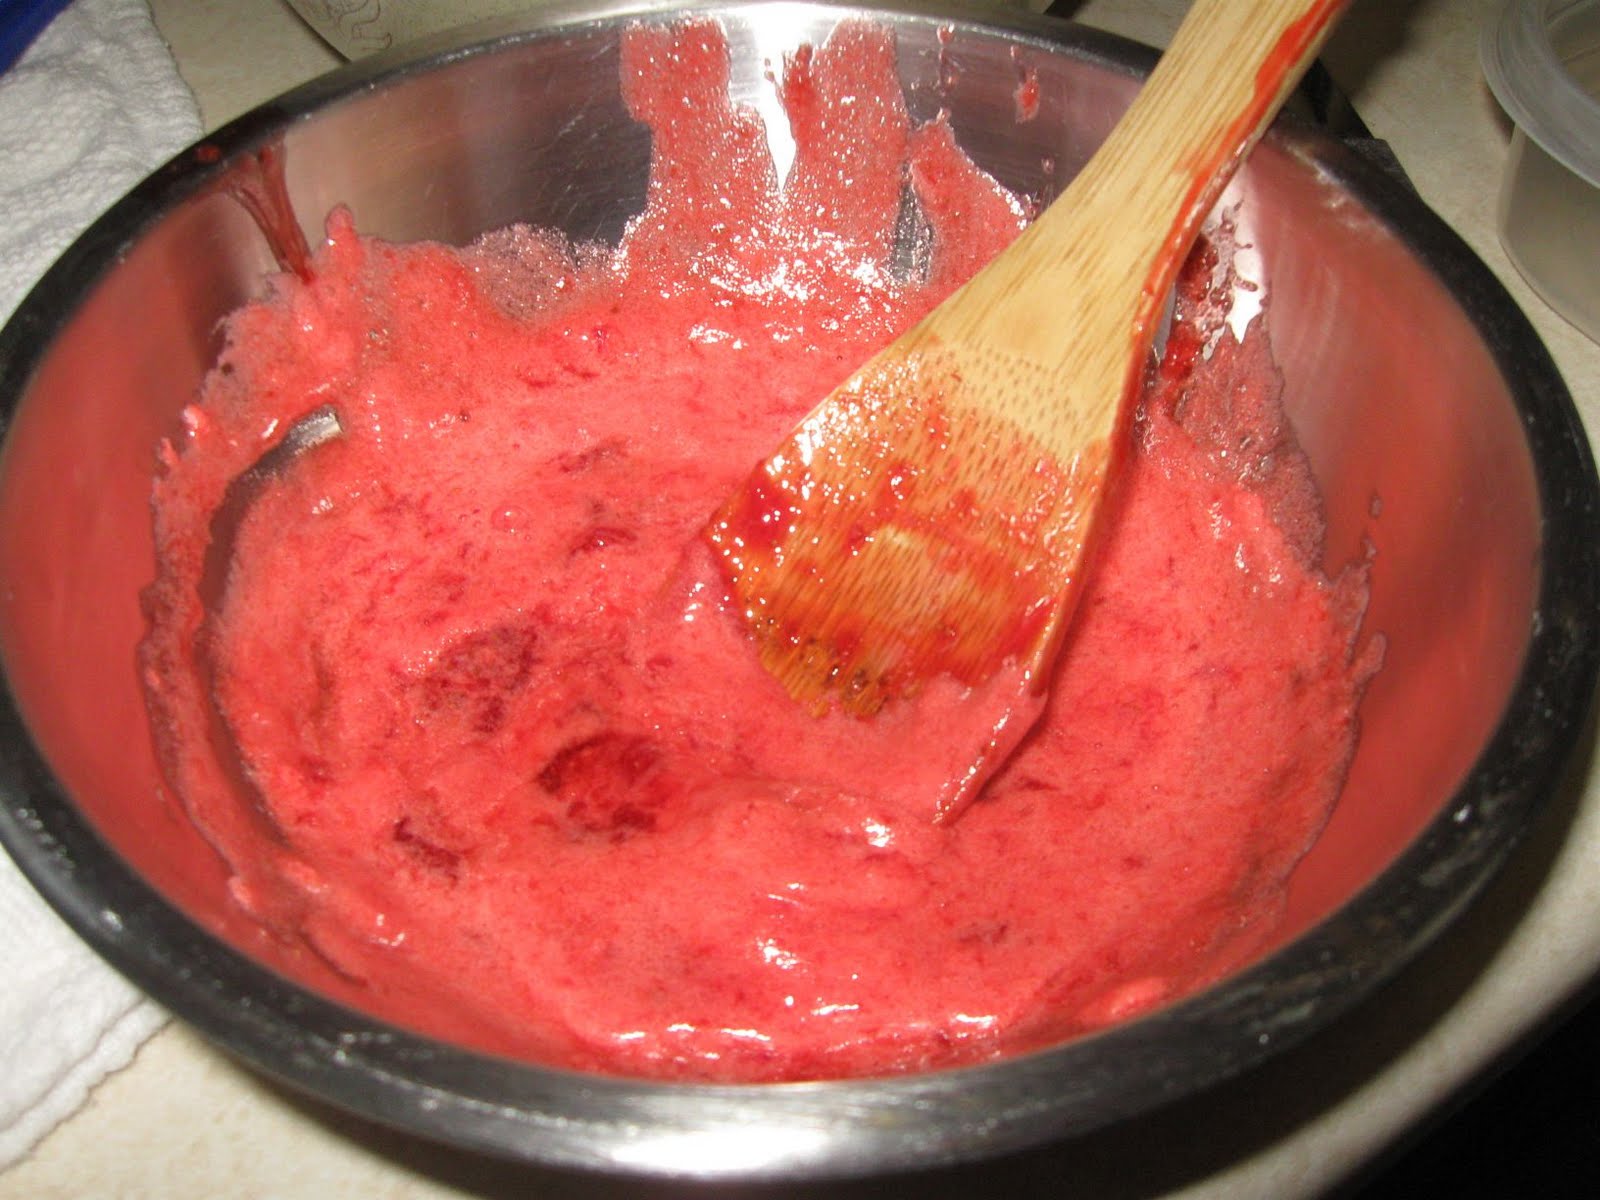
Wash and hull the strawberries, slice them into chunks and crush them. I used a potato masher to crush them.
Mix one envelope of pectin with 1/4 cup of the sugar. Stir that mixture and the strawberries together in a tall pot over high heat.
Stir constantly. When the berries come to a boil add the sugar.
That's alot of sugar. I cringed a little after seeing the huge pile of it, but it's for an entire recipe of jam and how much jam do you really use at a time, anyway?
Stirring constantly, bring the berry mixture to a hard boil, the kind you can't stir away. Continue stirring as you keep it at the boil point for one minute.
At this point, smarter people than me would test the jam by either putting a spoonful on a chilled plate or on a spoon that you have kept in ice water. Cool the sample and check to see if it's still a little runny. If it is, try boiling it a little longer or add more pectin from the extra box I was not smart enough to have on hand. I, of course, did not test it and my end product was a little runny. Lesson learned.
Pull the pot of jam off the heat and let it cool for 5 or 10 minutes. This is a good time to skim off the foam. Look at all the foam I removed!
Later I microwaved it (not in that metal bowl, of course) and it turned back into jam. Foam is just jam with some extra air in it. It's not as flavorful as the actual jam and it can reduce the shelf-life of your canned product, so while it won't hurt you (prior to spoilage, anyway) it's a good idea to get it outta your jam.
Also, while I was letting the jam cool I put the jars back in the boiling water so they would not break when I filled them with jam. As soon as I was done skimming the foam off the jam I pulled the jars out of the water for use.
Give the jam a stir, then using the funnel fill the jars to within 1/4 inch of the rim. Wipe the rim and place the lid on it, then screw on the lid-ring-thing. Once all your jars are full, use your special funky tongs to place them in the canner where you kept water boiling all this time, in anticipation of this moment!
Leave them in the boiling water for 5 or 10 minutes, depending on the elevation of where you live. Where I live it's under 1,000 ft above sea level, so I boiled them for 5 minutes. Pull them out, again using your funky tongs, and set them on the counter where they will be undisturbed for about 24 hours. You will hear the lids "pop" as they seal; it is such a happy little sound! After 24 hours, press on the middle of each lid. If any of them click up and down, they didn't seal. Use those first; it doesn't mean the jam isn't any good, it just means they aren't "canned" correctly, whether it was a problem with the lid, or maybe the jar's rim had a chip in it, who knows. All you need to know is you can open this jar first! This recipe filled 9 half-pint jars.
I dug into my jam first thing this morning, adding it to my peanut-butter wrap breakfast. It was fab!
It's a little runny, as you can see. And it is ultra-sweet. I think next time I will try making it with 4 cups of sugar instead of 6, and I will use more pectin, too. But it is a fresh, summery taste that I will be able to enjoy this winter when the only green to be seen is on the Christmas tree and spring and summer are something you just dream about.
Sunday, May 30, 2010
Andrea, You Are An Angel
Andrea, whoever you are, thank you so much for you comment on this post. I finally got around to trying your frappucino recipe today and LOVE it! I would have emailed you instead of making this big production of a thank you, but there was no contact information/link on your comment.
You guys, she said to put 1 scoop chocolate protein powder, 1/2 to 3/4 cup cold coffee and a handful of ice cubes in the blender. Follow her instructions, she is SO on to something. I am going to save a fortune in frappucino's! Not to mention it is less fat and sugar than my usual frapp.
Hope you are enjoying your Memorial Day Weekend! Or for you non-U.S. residents, I hope you are enjoying your regular weekend.
Have a fab evening. Stay tuned, tomorrow will be a recipe post and here's a hint... there will be alot of red in the photos. Any guesses as to the recipe???
You guys, she said to put 1 scoop chocolate protein powder, 1/2 to 3/4 cup cold coffee and a handful of ice cubes in the blender. Follow her instructions, she is SO on to something. I am going to save a fortune in frappucino's! Not to mention it is less fat and sugar than my usual frapp.
Hope you are enjoying your Memorial Day Weekend! Or for you non-U.S. residents, I hope you are enjoying your regular weekend.
Have a fab evening. Stay tuned, tomorrow will be a recipe post and here's a hint... there will be alot of red in the photos. Any guesses as to the recipe???
Monday, April 26, 2010
Crab Salad
The weather is warming up and I'm trying to think of ways to avoid cooking. And eat real foods. And incorporate more veggies. And here is success #1!
Serve over a bed of fresh kale and enjoy.
I tried to make little wraps with the kale but ended up making a mess instead, so I advise sticking to traditional salad presentation :)
- A package of crabmeat or imitation crabmeat,
- 2 tablespoons of mayo,
- maybe 2 cups of cooked pasta shells,
- a few generous dashes of dried dill (I love dill, I'll put it in anything), and
- salt and pepper to taste.
Serve over a bed of fresh kale and enjoy.
I tried to make little wraps with the kale but ended up making a mess instead, so I advise sticking to traditional salad presentation :)
Saturday, March 13, 2010
Day Three of No Frapps, and a Fabulous Shrimp Dish
Wahoo! Totally surviving frapp-free. Who knew?
I really wish I had taken pictures when I made dinner last night. It was amazing! I still have garlic breath from it, yikes.
I used a recipe from the Weight Watchers website for the shrimp, and served it over a side I created: 1 can black beans, 1 cup cooked quinoa, and enough coconut butter to flavor it. I added some water so I could leave it alone heating on the stove and it wouldn't burn while I cooked the shrimp.
The shrimp was fab! I started with 1 cup veggie broth from my last homemade batch; I found it in the freezer where it was just hanging out and waiting for something to do. Added 4 garlic cloves, chopped. And by chopped I mean I used the garlic press because I'm lazy. I let that simmer while I chopped 1/4 cup cilantro leaves and set them aside. When the broth/garlic combo was reduced by half I added 2 tablespoons of lime juice and let it simmer a few more minutes. Then I added a pound of shrimp and 1 tablespoon of butter. The recipe called for raw shrimp but I used pre-cooked. I'd tried to defrost it before I made dinner but they were still kinda frozen, so I covered the pot and let the whole schamole simmer until they were defrosted and completely heated through. Then I stirred in the cilantro and let it cook 2 or 3 more minutes. You're supposed to season with salt and pepper at that point but of course I forgot. No biggie, seasoning it once it was plated was sufficient.
Then I built the dish: first, a cushy bed of coconut-flavored quinoa and black beans, topped with a quarter of the shrimp (FOUR points for all that shrimp, awesome!), a few tablespoons of the sauce, and then because I can never resist a little heat, I swirled some garlic-chili paste on top.
Again, I so wish I had taken pictures. Words don't do it justice. Easy peasy to prepare, and the lime, garlic and coconut butter went together like they were made for each other. I think without the coconut butter it would have been missing something. The coconut flavor wasn't prominent; it was in the background, giving more presence to the other flavors and everything went perfectly with the shrimp. Next time I will be sure to snap a photo; a food post with no pics seems ridiculous but I just had to tell you about it.
I really wish I had taken pictures when I made dinner last night. It was amazing! I still have garlic breath from it, yikes.
I used a recipe from the Weight Watchers website for the shrimp, and served it over a side I created: 1 can black beans, 1 cup cooked quinoa, and enough coconut butter to flavor it. I added some water so I could leave it alone heating on the stove and it wouldn't burn while I cooked the shrimp.
The shrimp was fab! I started with 1 cup veggie broth from my last homemade batch; I found it in the freezer where it was just hanging out and waiting for something to do. Added 4 garlic cloves, chopped. And by chopped I mean I used the garlic press because I'm lazy. I let that simmer while I chopped 1/4 cup cilantro leaves and set them aside. When the broth/garlic combo was reduced by half I added 2 tablespoons of lime juice and let it simmer a few more minutes. Then I added a pound of shrimp and 1 tablespoon of butter. The recipe called for raw shrimp but I used pre-cooked. I'd tried to defrost it before I made dinner but they were still kinda frozen, so I covered the pot and let the whole schamole simmer until they were defrosted and completely heated through. Then I stirred in the cilantro and let it cook 2 or 3 more minutes. You're supposed to season with salt and pepper at that point but of course I forgot. No biggie, seasoning it once it was plated was sufficient.
Then I built the dish: first, a cushy bed of coconut-flavored quinoa and black beans, topped with a quarter of the shrimp (FOUR points for all that shrimp, awesome!), a few tablespoons of the sauce, and then because I can never resist a little heat, I swirled some garlic-chili paste on top.
Again, I so wish I had taken pictures. Words don't do it justice. Easy peasy to prepare, and the lime, garlic and coconut butter went together like they were made for each other. I think without the coconut butter it would have been missing something. The coconut flavor wasn't prominent; it was in the background, giving more presence to the other flavors and everything went perfectly with the shrimp. Next time I will be sure to snap a photo; a food post with no pics seems ridiculous but I just had to tell you about it.
Sunday, March 7, 2010
Beet Salad With Oranges, Walnuts and Blue Cheese
I was really excited to try fresh beets, and decided to make a salad with some fun add-in's. I've read the beets will stain your hands if you don't wear gloves, so I picked up some latex gloves in the cleaning aisle of the grocery store. I think it's more important once the beets are cooked, but I wasn't taking any chances and wore the gloves the entire time I worked with the beets!
First I prepared the beets by scrubbing them, then chopping off the greens and slicing the bottom so they would sit flat in the baking dish.
I placed them in a baking dish in about an inch of water before baking them at 350 for maybe 45 minutes.
I baked them after dinner one night, knowing I needed to get started on the beet experiment but not being able to find enough time to do the baking and make the salad by dinner-time on any particular day. Then I threw them in a baggie in the fridge for a few days. But eventually I worked up the nerve to make the salad. I love trying new veggies, and while I like pickled beets, the fresh beet is a whole new animal for me. So I put the gloves back on and peeled them. I wasn't able to just slide the skin off like with a blanched tomato; maybe I didn't cook them long enough for that. I ended up using a paring knife to remove the skin. Then I sliced them into eighths. So far, so good. I sliced up two oranges and tossed them with the beets, a quarter cup of blue cheese crumbles, two ounces of walnut pieces, and a generous splash of balsamic vinegar, with some olive oil and salt and pepper. It was gorgeous served over a bed of romaine, see for yourself:
And after I picked the beets out, it was quite good. I know! I wanted to love them, I really did. And my list of "no way" foods is really, really short. But it just got longer by one: fresh beets. Maybe. A friend gave me a beet salad recipe that is different from what I did here, and she swore her kids and husband loved it. So I will give beets one more try. It doesn't hurt that they're pretty.
First I prepared the beets by scrubbing them, then chopping off the greens and slicing the bottom so they would sit flat in the baking dish.
I placed them in a baking dish in about an inch of water before baking them at 350 for maybe 45 minutes.
And after I picked the beets out, it was quite good. I know! I wanted to love them, I really did. And my list of "no way" foods is really, really short. But it just got longer by one: fresh beets. Maybe. A friend gave me a beet salad recipe that is different from what I did here, and she swore her kids and husband loved it. So I will give beets one more try. It doesn't hurt that they're pretty.
Sunday, February 28, 2010
Easy and Good: Kale Chips
How long ago did I buy that kale? Because it still looks pretty good.
I had three bunches left and used one for this recipe. I'd say it made one serving. I ripped the leaves into pieces, putting the thick stems in the freezer to make broth with another time. Recipes for kale chips are all over the net but the gist seems to be toss them with olive oil and seasoning, them bake for 10 or 15 minutes. I kept it simple, tossing mine with olive oil, salt and pepper after I washed them. Then I spread them on parchment paper to bake.
After 15 minutes in the oven at 350, they were ready. Crispy, yummy and green, who knew! This is going to my my new go-to snack if I want something crunchy. Try them, you will not believe how easy they are to make, and how fun it is to eat "chips" that are so healthy!
Wednesday, February 17, 2010
Kale and Cannellini Soup and Random Thoughts
I made a fabulous soup last night, cooking with kale for the first time ever! And I have more than enough greens left over to try kale chips and probably something else too.
Look at all that kale, and for only 98 cents:

After seasoning with salt, pepper and dried dill, I separated the soup into two saucepans because I was adding chopped Canadian bacon to J's soup. I never brought the soup to a simmer; I thought that might be a bad idea with a dairy product in the mix. And here is the finished product! Note the difference in bowl sizes. That is one of the ways I cope with cooking for someone who has no need to lose weight and can eat anything he wants with no repercussions.
The soup was great. The texture of the kale was similar to spinach but with a milder flavor, and the cheese, while I did not use much, added some depth and personality to the mix. The dill was just a guess, but it turned out to be the perfect match. Of course for the purposes of full disclosure I should add that I'm a dill freak and I buy it in the bulk section of the grocery store because I go through so much of it.
Kale Experiment #1: Success! Looking forward to Kale Experiment #2: TBD. Probably kale chips.
Now for the random thoughts:
Look at all that kale, and for only 98 cents:
I used about half of it and ended up with maybe two cups of greens once I stripped them from their stems (and washed and chopped them).
I made two quarts of broth the night before using my mystery soup method. One quart went into the freezer and the other into the soup. I added a can of cannellini beans, drained and rinsed, the kale, and then a few ounces of one of the Valentine's Day cheeses.

Kale Experiment #1: Success! Looking forward to Kale Experiment #2: TBD. Probably kale chips.
Now for the random thoughts:
- Weigh-in tonight! I'm a little nervous. I was at 187 and change this morning, so I'm pretty sure I won't be getting my 15 lb reward this week. Ah well, there's always next week.
- I'd intended this blog to be about my weight-loss journey and titled it accordingly, but I'm posting an awful lot of recipes. Do I need to refocus? Cut back on the recipes and post more about other weight loss efforts? Maybe do I need to start a second blog for the recipes? Seriously, I have two more cooking posts to put up but haven't yet because I think I'm already on the brink of over-kill with the cooking.
Friday, January 15, 2010
Shirataki Noodle and Winter Vegetable Extravaganza
I wanted to make a low point dinner since I had overindulged earlier today. This was a perfect opportunity to try the Shirataki noodles, rutabaga and parsnips that I bought and have been working up the nerve to try.
I have not had rutabaga since I was little and my mom put it in a stew. I’ve never had parsnips. The rutabaga was round with a waxy looking skin that I pared off before chopping it. The parsnips looked like white carrots.
After peeling and chopping the veggies, I tossed them with olive oil, garlic salt, pepper and Italian seasonings.
I spread them on parchment paper on a baking sheet and baked them at 475. While they were cooking I started the noodles.
I read about the noodles on Hungry Girl's Website. Shirataki noodles are made from tofu; they are a very low calorie pasta substitute at a teeny 20 calories per serving. Apparently they have an odd taste if not prepared properly, so you are supposed to rinse, rinse, rinse them, and rinse them some more, then dry them prior to using in the dish you are preparing. So I rinsed. Alot.
Then I boiled them briefly before rinsing them again. Meanwhile I sautéed some mushrooms in olive oil pam and added a cup of vodka sauce to the mushrooms to heat.
At this point the veggies were not quite done yet, so I set the oven on broil to wrap things up. By the time I plated the noodles and sauce the vegetables were done. I’m guessing they took half an hour to cook but you might allow for more time.
Both vegetables were similar to potatoes. I loved the parsnips. They were mild and a little sweet. The rutabaga had a little bit of an earthy taste but wasn’t bad. The noodles were fine. A little rubbery but no more so than al dente pasta. There seemed to be a little bit of a different taste to the noodle dish to me, but maybe it was just that those mushrooms had been in the fridge a little longer than they should have been! It’s weird to have eaten a serving of pasta and not have that carby-feeling afterward.
So after I broke the point bank earlier today, I still managed to make a filling and nutritious dinner; the only significant points were from the vodka sauce and the olive oil on the vetables. A salad would have been nice but I am so full, I don’t think I could have eaten one. All in all, not bad for a “save the points” meal. I'm guessing the only one of the three new foods I would buy again would be the parsnips.
I have not had rutabaga since I was little and my mom put it in a stew. I’ve never had parsnips. The rutabaga was round with a waxy looking skin that I pared off before chopping it. The parsnips looked like white carrots.
After peeling and chopping the veggies, I tossed them with olive oil, garlic salt, pepper and Italian seasonings.
I spread them on parchment paper on a baking sheet and baked them at 475. While they were cooking I started the noodles.
I read about the noodles on Hungry Girl's Website. Shirataki noodles are made from tofu; they are a very low calorie pasta substitute at a teeny 20 calories per serving. Apparently they have an odd taste if not prepared properly, so you are supposed to rinse, rinse, rinse them, and rinse them some more, then dry them prior to using in the dish you are preparing. So I rinsed. Alot.
Then I boiled them briefly before rinsing them again. Meanwhile I sautéed some mushrooms in olive oil pam and added a cup of vodka sauce to the mushrooms to heat.
At this point the veggies were not quite done yet, so I set the oven on broil to wrap things up. By the time I plated the noodles and sauce the vegetables were done. I’m guessing they took half an hour to cook but you might allow for more time.
Both vegetables were similar to potatoes. I loved the parsnips. They were mild and a little sweet. The rutabaga had a little bit of an earthy taste but wasn’t bad. The noodles were fine. A little rubbery but no more so than al dente pasta. There seemed to be a little bit of a different taste to the noodle dish to me, but maybe it was just that those mushrooms had been in the fridge a little longer than they should have been! It’s weird to have eaten a serving of pasta and not have that carby-feeling afterward.
So after I broke the point bank earlier today, I still managed to make a filling and nutritious dinner; the only significant points were from the vodka sauce and the olive oil on the vetables. A salad would have been nice but I am so full, I don’t think I could have eaten one. All in all, not bad for a “save the points” meal. I'm guessing the only one of the three new foods I would buy again would be the parsnips.
Tuesday, January 5, 2010
Steamed Pork Dumplings
I mentioned the steamed pork dumplings in this post. It’s our favorite thing to get when we order Chinese take-out, and I wanted to have control over exactly what goes into them and know their nutritional information and point value. Plus our fave Chinese place closed and the new place made a much doughier dumpling. Still good, but not the same. So I found a recipe I thought I could try and the fun began! I've made them four or five times and it gets easier each time.
I was not paying attention at the grocery store and bought a little over a pound of ground pork this time instead of the 1 ¾ pounds that the half a recipe calls for. So here are the amounts I ended up with:
1.2 lbs ground pork
3 cups chopped cabbage
1 tablespoon freshly grated ginger
2 cloves of garlic
2 tablespoons soy sauce
1 ½ tablespoons sesame oil
1 egg
46 wonton wrappers (I must have overfilled the dumplings a little, half a recipe should make 50 dumplings but I think only being off by 4 is not too shabby.)
I chopped about half a head of cabbage and added to the pork in the mixing bowl. Usually I buy the angel hair coleslaw mix but I went to the store twice and they were out both times. It was fun to practice chopping, and the odds and ends that didn’t make it into the dumplings went into my admittedly eccentric Mystery Broth freezer bag (explained here).
I also enjoy smashing garlic, a hobby which comes in handy when cooking. I mixed it up just for you this time. One garlic clove went into the garlic press.
And the other got my favorite treatment, I laid the flat of a knife on it and then slammed the knife into the garlic clove, smashing it. Then I chopped it, no pictures of the chopping, not as exciting.
I grated a nub of fresh ginger into the mixture. To be honest, it was a nub of frozen ginger. When I buy ginger, I snap it into pieces about the size of the end of my thumb and keep it in the freezer since I don’t use it that often.
Add the rest of the ingredients and mix. I use my hands, and yes, it kinda grosses me out. But the end result is worth it.
Prepare your work space by flouring the spot you will be assembling the dumplings and setting a small bowl of water nearby for dipping your fingers when wetting the wonton wrappers.
I recommend laying out the wonton wrappers and spooning in the filling assembly-line style. I lay out as many wonton wrappers as I have space for, then put a little less than a tablespoon of the pork mixture in each one.
The next part I do one at a time. Wet the edges of a dumpling, fold it over into a triangle and press the edges together. I find it’s easiest to press the apex of the triangle together first, then to do the edges while you hold the dumpling. Then if you overfilled it you can poke the filling around to make sure you have clean wonton wrapper edges for sealing.
Here is a handful of dumplings that I have on parchment paper and am about to put in the freezer. We only eat about 15 at one meal so this time I made as many dumplings as I could with the filling and froze the excess dumplings for future, much easier homemade Chinese dinners. In the past I have just frozen the excess dumpling mixture because I didn't have two hours to spare putting together the entire batch.
Steam the dumplings for 20 to 30 minutes. I use a stainless steel steamer basket and non-stick spray. The basket can fit about 8 of them; if they touch they will stick together. Serve with your sauce of choice. I like a combination of equal parts rice vinegar, mirin (a sweet cooking wine or sake), soy sauce and maybe a half teaspoon chili paste per serving.
Some people say to sauté them a little to give them some color. It might make them prettier but I just like them steamed. They are full of flavor and are one of my favorite dinners. I like the dipping sauce as much as I like the dumplings. I was thinking maybe I should marinate some veggies in the sauce and grill or broil them. Or use it as a salad dressing. Currently my go-to salad dressing is a few splashes of rice vinegar and two teaspoons of olive oil. But I digress.
Since the recipe made three times what we will eat, I spread the extra out on trays without cooking them, and froze them. Once they were close to frozen solid I tossed them in a big Ziploc bag.
The next two times we want dumplings, I can steam the frozen ones for about 35 minutes, make the sauce and maybe a salad, and dinner is served!
Now I just need to figure out what to do with the other half of that head of cabbage. Any ideas?
I was not paying attention at the grocery store and bought a little over a pound of ground pork this time instead of the 1 ¾ pounds that the half a recipe calls for. So here are the amounts I ended up with:
1.2 lbs ground pork
3 cups chopped cabbage
1 tablespoon freshly grated ginger
2 cloves of garlic
2 tablespoons soy sauce
1 ½ tablespoons sesame oil
1 egg
46 wonton wrappers (I must have overfilled the dumplings a little, half a recipe should make 50 dumplings but I think only being off by 4 is not too shabby.)
I chopped about half a head of cabbage and added to the pork in the mixing bowl. Usually I buy the angel hair coleslaw mix but I went to the store twice and they were out both times. It was fun to practice chopping, and the odds and ends that didn’t make it into the dumplings went into my admittedly eccentric Mystery Broth freezer bag (explained here).
I also enjoy smashing garlic, a hobby which comes in handy when cooking. I mixed it up just for you this time. One garlic clove went into the garlic press.
And the other got my favorite treatment, I laid the flat of a knife on it and then slammed the knife into the garlic clove, smashing it. Then I chopped it, no pictures of the chopping, not as exciting.
I grated a nub of fresh ginger into the mixture. To be honest, it was a nub of frozen ginger. When I buy ginger, I snap it into pieces about the size of the end of my thumb and keep it in the freezer since I don’t use it that often.
Add the rest of the ingredients and mix. I use my hands, and yes, it kinda grosses me out. But the end result is worth it.
Prepare your work space by flouring the spot you will be assembling the dumplings and setting a small bowl of water nearby for dipping your fingers when wetting the wonton wrappers.
I recommend laying out the wonton wrappers and spooning in the filling assembly-line style. I lay out as many wonton wrappers as I have space for, then put a little less than a tablespoon of the pork mixture in each one.
The next part I do one at a time. Wet the edges of a dumpling, fold it over into a triangle and press the edges together. I find it’s easiest to press the apex of the triangle together first, then to do the edges while you hold the dumpling. Then if you overfilled it you can poke the filling around to make sure you have clean wonton wrapper edges for sealing.
Here is a handful of dumplings that I have on parchment paper and am about to put in the freezer. We only eat about 15 at one meal so this time I made as many dumplings as I could with the filling and froze the excess dumplings for future, much easier homemade Chinese dinners. In the past I have just frozen the excess dumpling mixture because I didn't have two hours to spare putting together the entire batch.
Steam the dumplings for 20 to 30 minutes. I use a stainless steel steamer basket and non-stick spray. The basket can fit about 8 of them; if they touch they will stick together. Serve with your sauce of choice. I like a combination of equal parts rice vinegar, mirin (a sweet cooking wine or sake), soy sauce and maybe a half teaspoon chili paste per serving.
Some people say to sauté them a little to give them some color. It might make them prettier but I just like them steamed. They are full of flavor and are one of my favorite dinners. I like the dipping sauce as much as I like the dumplings. I was thinking maybe I should marinate some veggies in the sauce and grill or broil them. Or use it as a salad dressing. Currently my go-to salad dressing is a few splashes of rice vinegar and two teaspoons of olive oil. But I digress.
Since the recipe made three times what we will eat, I spread the extra out on trays without cooking them, and froze them. Once they were close to frozen solid I tossed them in a big Ziploc bag.
The next two times we want dumplings, I can steam the frozen ones for about 35 minutes, make the sauce and maybe a salad, and dinner is served!
Now I just need to figure out what to do with the other half of that head of cabbage. Any ideas?
Monday, January 4, 2010
Baked Crab Rangoon
I’ve tried these before (see this post) but thought I’d take another stab at them. This time with pictures!
I went recipe-free but did add the mayonnaise that so many recipes seemed to include. I used:
8 oz Neufchatel cheese
¼ cup light mayo
6 oz imitation crab
Dash onion powder
Dash garlic powder
16 won ton wrappers
Pretty nasty-looking jar of mayo, huh? Just keepin’ it real, people.
I chopped up the crab but am thinking it doesn’t look right, maybe I will try canned crab next time.
I used a hand potato-masher-smasher to mix this since I didn’t plan far enough ahead of time to soften the cheese. It worked out pretty well I think.
Then I placed the won ton wrappers gently into a muffin-tin sprayed with non-stick stuff. I love that tin, it was a present from one of the sisters last year. Thanks Nancy!
Then I baked them for 20 or 30 minutes at 350. I usually check them occasionally and pull them out of the oven when the won ton wrappers turn a little beyond golden brown. I lost track of the time they were baking because I was making steamed pork dumplings at the same time. Tune back in tomorrow for the dumpling recipe and those pictures!
I think they’re pretty cute. I left them open because there was so much filling; I still had some left over; I will probably use it for salad. I think I like them better left open like this, but next time I make a batch I will close them up and take some more pictures for you. I still need to tweak them; they are yummy but don’t taste quite like the crab rangoon from a Chinese restaurant. Maybe it will help if I remember the green onions next time.
Now if you’ll excuse me, I have a kitchen to clean. Raw pork freaks me out.
I went recipe-free but did add the mayonnaise that so many recipes seemed to include. I used:
8 oz Neufchatel cheese
¼ cup light mayo
6 oz imitation crab
Dash onion powder
Dash garlic powder
16 won ton wrappers
Pretty nasty-looking jar of mayo, huh? Just keepin’ it real, people.
I chopped up the crab but am thinking it doesn’t look right, maybe I will try canned crab next time.
I used a hand potato-masher-smasher to mix this since I didn’t plan far enough ahead of time to soften the cheese. It worked out pretty well I think.
Then I placed the won ton wrappers gently into a muffin-tin sprayed with non-stick stuff. I love that tin, it was a present from one of the sisters last year. Thanks Nancy!
Then I baked them for 20 or 30 minutes at 350. I usually check them occasionally and pull them out of the oven when the won ton wrappers turn a little beyond golden brown. I lost track of the time they were baking because I was making steamed pork dumplings at the same time. Tune back in tomorrow for the dumpling recipe and those pictures!
I think they’re pretty cute. I left them open because there was so much filling; I still had some left over; I will probably use it for salad. I think I like them better left open like this, but next time I make a batch I will close them up and take some more pictures for you. I still need to tweak them; they are yummy but don’t taste quite like the crab rangoon from a Chinese restaurant. Maybe it will help if I remember the green onions next time.
Now if you’ll excuse me, I have a kitchen to clean. Raw pork freaks me out.
Tuesday, December 29, 2009
Homemade Veggie Broth
I have a habit of keeping vegetable scraps in the freezer. Every once in a while I justify the habit by throwing it all in a pot and making homemade veggie broth. It’s not hard, and it’s a great way to use up all those scraps that don’t make it into your dinners: potato and carrot peelings, the tops and bottoms of onions and celery, the vegetables that I thought I would use but didn’t and they are going to go bad in a day or two. All of that makes its way into the freezer and eventually, the broth. Or as I call it, Mystery Soup. Either way, I made it so I know it’s low in sodium and high in nutrition.
It’s easy to start. Throw that handful of green beans no one put on their plate into a bag or container and put it in the freezer. Add to it when you have scraps from cooking. Soon enough you’ll have enough to cook.
Throw it in a pot with a few cups of water. I added some fresh baby carrots and celery this time because my Mystery Soup bags tend to be heavy on the onion.
I don’t season the broth because there is no telling what I will use it for: to make soup, to flavor mashed potatoes, to cook rice, for the liquid in homemade bread, or as a low-fat medium for sautéing chicken and vegetables.
Bring to a boil, turn down the heat until its just simmering, cover and let it do its thing.
Once the veggies are mushy and look like all the goodness has been cooked out of them, drain them over a bowl.
(Ignore the flour in the corner of that photo; I was making bread while the broth simmered.) Dispose of the cooked vegetable scraps, and think of ways to use your homemade broth!
I used this batch to make salmon chowder.
It’s easy to start. Throw that handful of green beans no one put on their plate into a bag or container and put it in the freezer. Add to it when you have scraps from cooking. Soon enough you’ll have enough to cook.
Throw it in a pot with a few cups of water. I added some fresh baby carrots and celery this time because my Mystery Soup bags tend to be heavy on the onion.
Bring to a boil, turn down the heat until its just simmering, cover and let it do its thing.
Once the veggies are mushy and look like all the goodness has been cooked out of them, drain them over a bowl.
(Ignore the flour in the corner of that photo; I was making bread while the broth simmered.) Dispose of the cooked vegetable scraps, and think of ways to use your homemade broth!
I used this batch to make salmon chowder.
Monday, December 28, 2009
The Conclusion of the Trifecta of Chocolaty Goodness: All Bran Brownies
I had it stuck in my mind that I’d seen a recipe with brownie mix, All Bran cereal and water. Of course I had not bookmarked the recipe, and now that I’m looking for it I see tons of versions of this recipe. The All-Bran website has a version without brownie mix… cocoa, flour, etc. But I’m staying true to brownie mix in the Trifecta of Chocolaty Goodness. The low-calorie and diet websites all seemed to have member versions of the recipe, so here’s a link to one on Dotti’s Weight Loss Zone. It’s for muffins, but the idea is the same. And all the recipes I saw, whether for brownies or for chocolate muffins, called for baking powder. Now that says to me “Liz, this is gonna be a cakey brownie, not a fudgie one.” As a lover of fudgie brownies, I decided to throw caution to the wind and just wing it, making up my own recipe.
Here is the basic idea I started with:
3 cups All Bran cereal
2 ½ cups water
1 package brownie mix
2 Tbs mini semisweet chocolate chips
Check me out, rockin' the store brand chips and generic mix. I do love to save a buck.
Mix the water into the cereal and let them sit together for at least 5 minutes so they can learn to enjoy each other’s company. Then add the brownie mix and chips. Stir, spread in a pan you have sprayed with non-stick spray, and bake for 20 minutes at 350.
I could not resist tampering with the brownies a little more. I had some homemade cranberry sauce leftover from Christmas. I was in a hurry when I made the cran sauce or I would have taken pictures, the cranberries were so bright and cheery-looking through the short 15-minute process it takes to make the sauce. I attempted to swirl the cranberry sauce on top of the pan of brownie batter. I’ve never swirled anything into brownie better before; it turned out more like a “W” which I will say stands for “Wow.”
After seeing how bad that looked, I threw a handful or so more chocolate chips on top. Then I shoved it in the oven before I could mess with it anymore.
At 20 minutes they looked good, but a finger-poke found them mushy. After 10 more minutes they appeared solid enough. I had one while they were still warm because my mama didn’t raise any fools.
Here’s the good news: the chocolate gives the cranberry sauce a good solid canvas for its tart kick, and berry’s flavor enhances that of the chocolate. Cranberries and chocolate are a match made in heaven.
Now for the bad news: wow, the bran is really obvious. Bran is not bad. It was in the cupboard because I like it. But it interferes significantly with the brownie-ness of the brownies. I see now why there are so many recipes out there for chocolate muffins with All Bran; it is probably more suited to a muffin or maybe a bar. So I’ll call these chocolate-cranberry muffin bars next time. They are not brownies, not to me, but they are still pretty darn good!
Here is the basic idea I started with:
3 cups All Bran cereal
2 ½ cups water
1 package brownie mix
2 Tbs mini semisweet chocolate chips
Check me out, rockin' the store brand chips and generic mix. I do love to save a buck.
Mix the water into the cereal and let them sit together for at least 5 minutes so they can learn to enjoy each other’s company. Then add the brownie mix and chips. Stir, spread in a pan you have sprayed with non-stick spray, and bake for 20 minutes at 350.
I could not resist tampering with the brownies a little more. I had some homemade cranberry sauce leftover from Christmas. I was in a hurry when I made the cran sauce or I would have taken pictures, the cranberries were so bright and cheery-looking through the short 15-minute process it takes to make the sauce. I attempted to swirl the cranberry sauce on top of the pan of brownie batter. I’ve never swirled anything into brownie better before; it turned out more like a “W” which I will say stands for “Wow.”
After seeing how bad that looked, I threw a handful or so more chocolate chips on top. Then I shoved it in the oven before I could mess with it anymore.
At 20 minutes they looked good, but a finger-poke found them mushy. After 10 more minutes they appeared solid enough. I had one while they were still warm because my mama didn’t raise any fools.
Here’s the good news: the chocolate gives the cranberry sauce a good solid canvas for its tart kick, and berry’s flavor enhances that of the chocolate. Cranberries and chocolate are a match made in heaven.
Now for the bad news: wow, the bran is really obvious. Bran is not bad. It was in the cupboard because I like it. But it interferes significantly with the brownie-ness of the brownies. I see now why there are so many recipes out there for chocolate muffins with All Bran; it is probably more suited to a muffin or maybe a bar. So I’ll call these chocolate-cranberry muffin bars next time. They are not brownies, not to me, but they are still pretty darn good!
Monday, December 7, 2009
Blueberry Oatmeal Pancake
I could have sworn I found this recipe on the internet, but I have searched and searched and cannot find where it came from, now. So if this is your recipe, please comment and let me know and I will attribute it to you.
The recipe makes 1 serving and calls for:
½ cup egg beaters (I use 3 egg whites)
1/3 cup oatmeal
1/3 cup blueberries (I use frozen)
Dash cinnamon
Dash salt
Splash vanilla
Mix them all together and cook like any pancake: in a pan sprayed with non-stick spray and watch carefully for flippin-time. I would recommend cooking on a lower heat setting so that the pancake cooks all the way through; with the blueberries and the oatmeal, it is a thicker pancake. I used ½ cup frozen blueberries this time and it was a little too many berries for the batter.
I use either fat-free Promise or I Can’t Believe It’s Not Butter Spray, and instead of syrup, heated agave nectar. The amber variety of Madhava Agave Nectar
has a smoky, almost maple flavor and goes very well with pancakes. It also has a lower glycemic index than syrup, or so I hear. Which it means it has less impact on blood sugar. Keep in mind that all my medical information comes from random internet searches so take my statements for what they’re worth. All I know is I lovelovelove Agave Nectar! I will probably dedicate an entire post to it sometime in the near future.
The pancake looks a little scary because the frozen blueberries squished; trust me, it is yummy! And it’s low in fat, packed with protein and fiber and antioxidants… all those things that I like to seek out for my healthier diet. The protein and fiber help keep me full almost all the way to lunchtime.
I just wanted to share that I have gone to the gym for the first time in months, and I have gone two days in a row! Yesterday I did 20 minutes on the elliptical machine, stretched out and did some situps, and today I did the same thing except added 10 more minutes to the elliptical. I go so slowly on the elliptical because I try to stay in the “fat-burning zone” and I reach that pretty quickly. It’s almost embarrassing and whenever I hear anyone laugh I look around to make sure it’s not because of my slow-mo workout! Ok, two more trips to the gym this week and I get my reward of a new pair of sneakers.
Have a fab week!
The recipe makes 1 serving and calls for:
½ cup egg beaters (I use 3 egg whites)
1/3 cup oatmeal
1/3 cup blueberries (I use frozen)
Dash cinnamon
Dash salt
Splash vanilla
Mix them all together and cook like any pancake: in a pan sprayed with non-stick spray and watch carefully for flippin-time. I would recommend cooking on a lower heat setting so that the pancake cooks all the way through; with the blueberries and the oatmeal, it is a thicker pancake. I used ½ cup frozen blueberries this time and it was a little too many berries for the batter.
I use either fat-free Promise or I Can’t Believe It’s Not Butter Spray, and instead of syrup, heated agave nectar. The amber variety of Madhava Agave Nectar
The pancake looks a little scary because the frozen blueberries squished; trust me, it is yummy! And it’s low in fat, packed with protein and fiber and antioxidants… all those things that I like to seek out for my healthier diet. The protein and fiber help keep me full almost all the way to lunchtime.
I just wanted to share that I have gone to the gym for the first time in months, and I have gone two days in a row! Yesterday I did 20 minutes on the elliptical machine, stretched out and did some situps, and today I did the same thing except added 10 more minutes to the elliptical. I go so slowly on the elliptical because I try to stay in the “fat-burning zone” and I reach that pretty quickly. It’s almost embarrassing and whenever I hear anyone laugh I look around to make sure it’s not because of my slow-mo workout! Ok, two more trips to the gym this week and I get my reward of a new pair of sneakers.
Have a fab week!
Subscribe to:
Posts (Atom)